
Touch Your Heart
All Questions
You can long press the phone number in Phone interface and add it to blacklist(For Funtouch OS 2.6 and lower version, select More>Add to blacklist).
If you want to reject all the strange numbers:
For Funtouch OS 9.0 and higher version, go to Settings>System app settings>Phone>Rejection, turn on Reject calls from unknown numbers;
For Funtouch OS 4.0 and higher version, please go to Settings>Phone>Rejection, turn on Reject calls from unknown numbers;
For Funtouch OS 3.0 and higher version, you can download & install the third-party apps to achieve it. Don`t forget to turn on Contacts & Phone permissions and allow them them to Autostart;
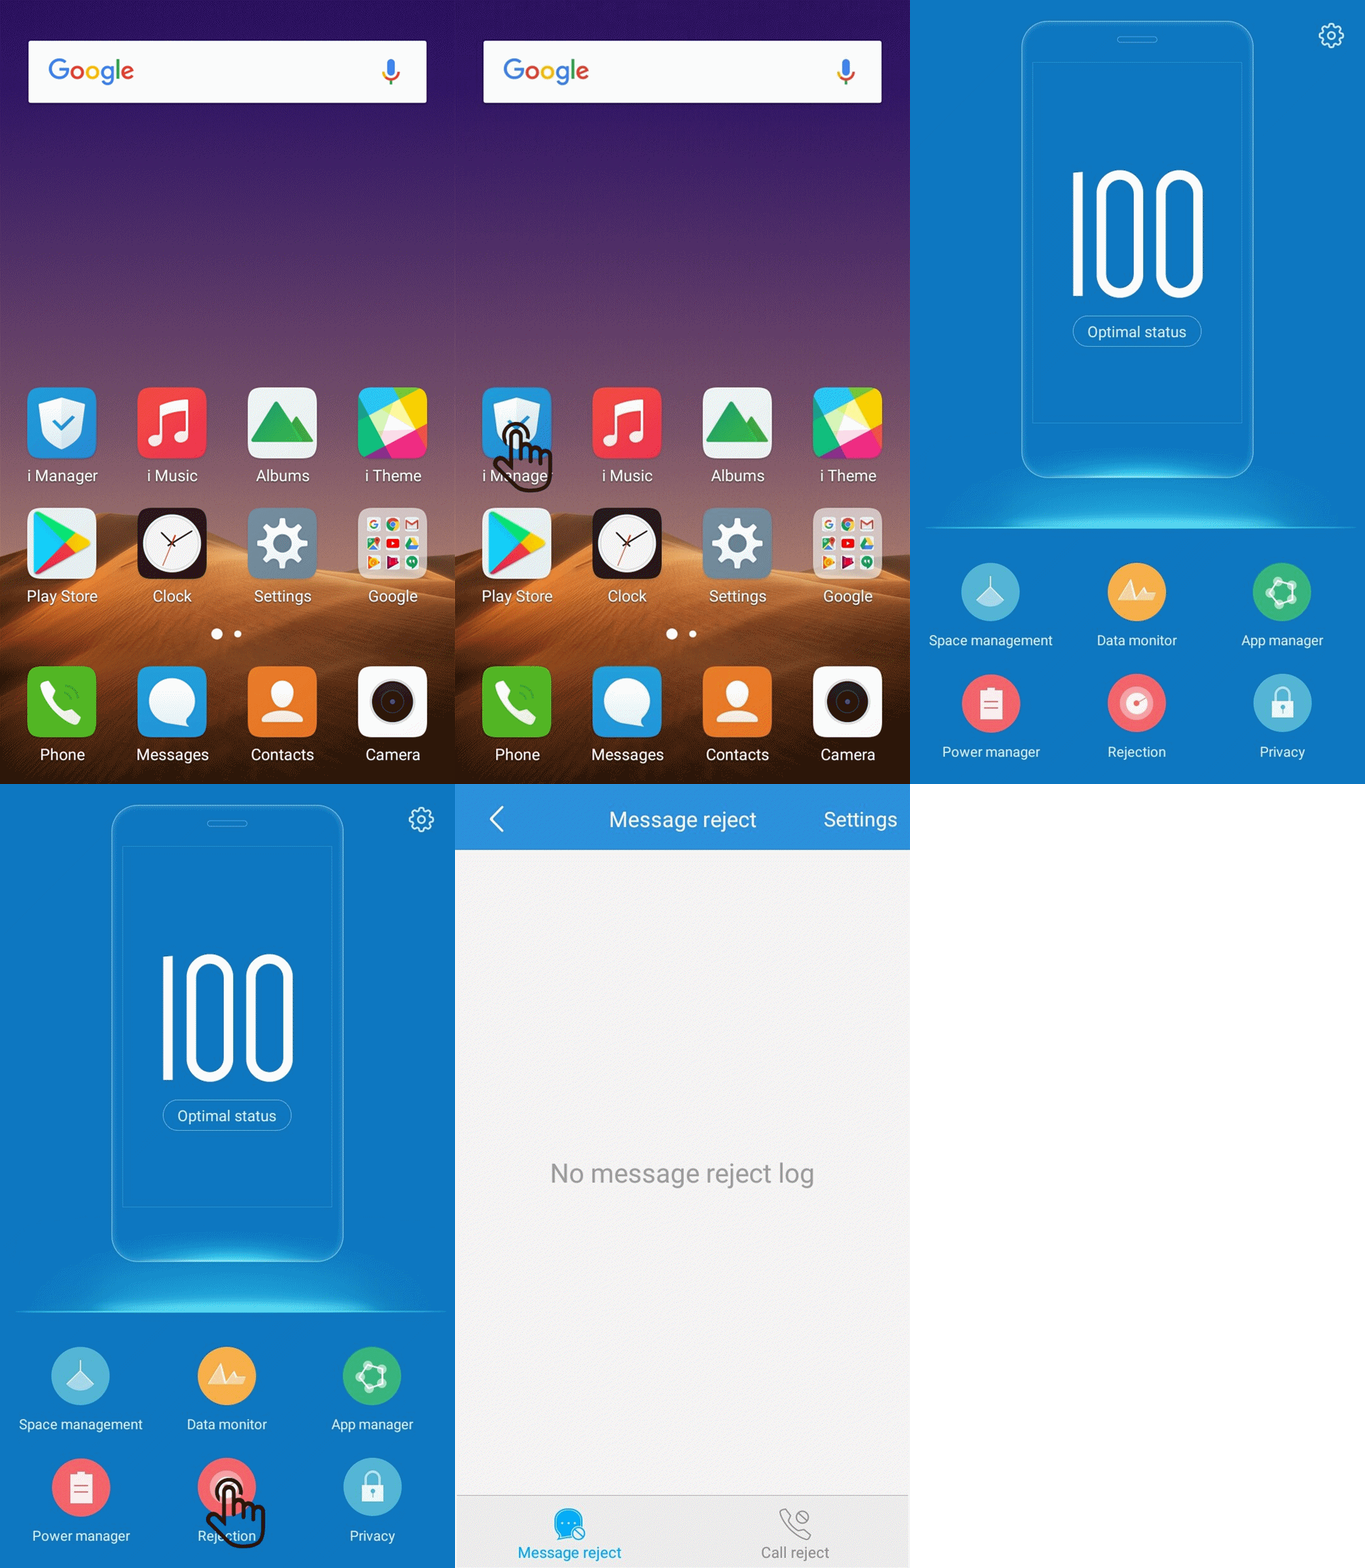
For Funtouch OS 2.6 and lower version, you can go to i Manager>Rejection>Settings>turn on Rejection, and then choose Blocking mode>“ Only allow contacts”.
You can go to Settings>(System app settings>)Phone>Call barring>turn on All incoming calls to reject all the incoming calls.
Warmly Tips: This service is provided by your carrier. Please consult your carrier and make sure it is enabled before turning it on.
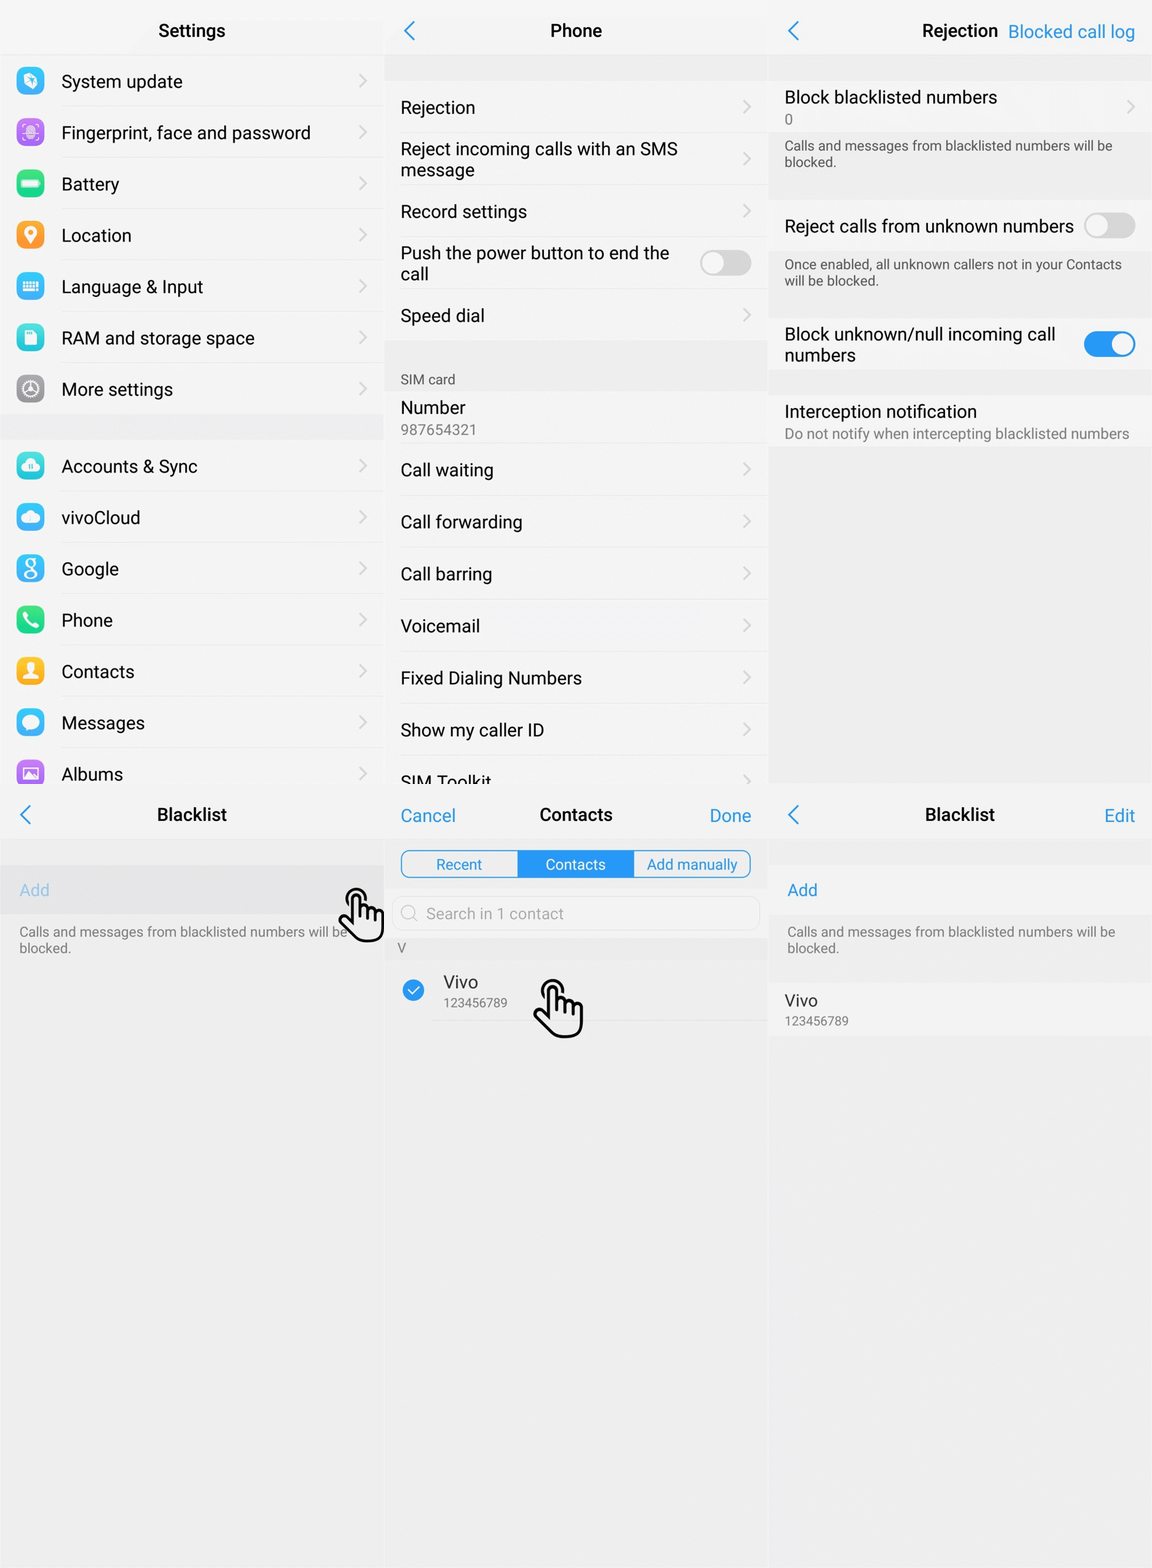
For Funtouch OS 9.0 and higher version, you can go to Settings>System app settings>Phone>Rejection>Block blacklist numbers, click “Add” to add the contacts or numbers to Blacklist, and then the calls and messages from the contacts will be blocked.
For Funtouch OS 4.0 and higher version, please go to Settings>Phone>Rejection>Block blacklist numbers>Add to add the contacts or numbers to Blacklist, and then the calls and messages from the contacts will be blocked.
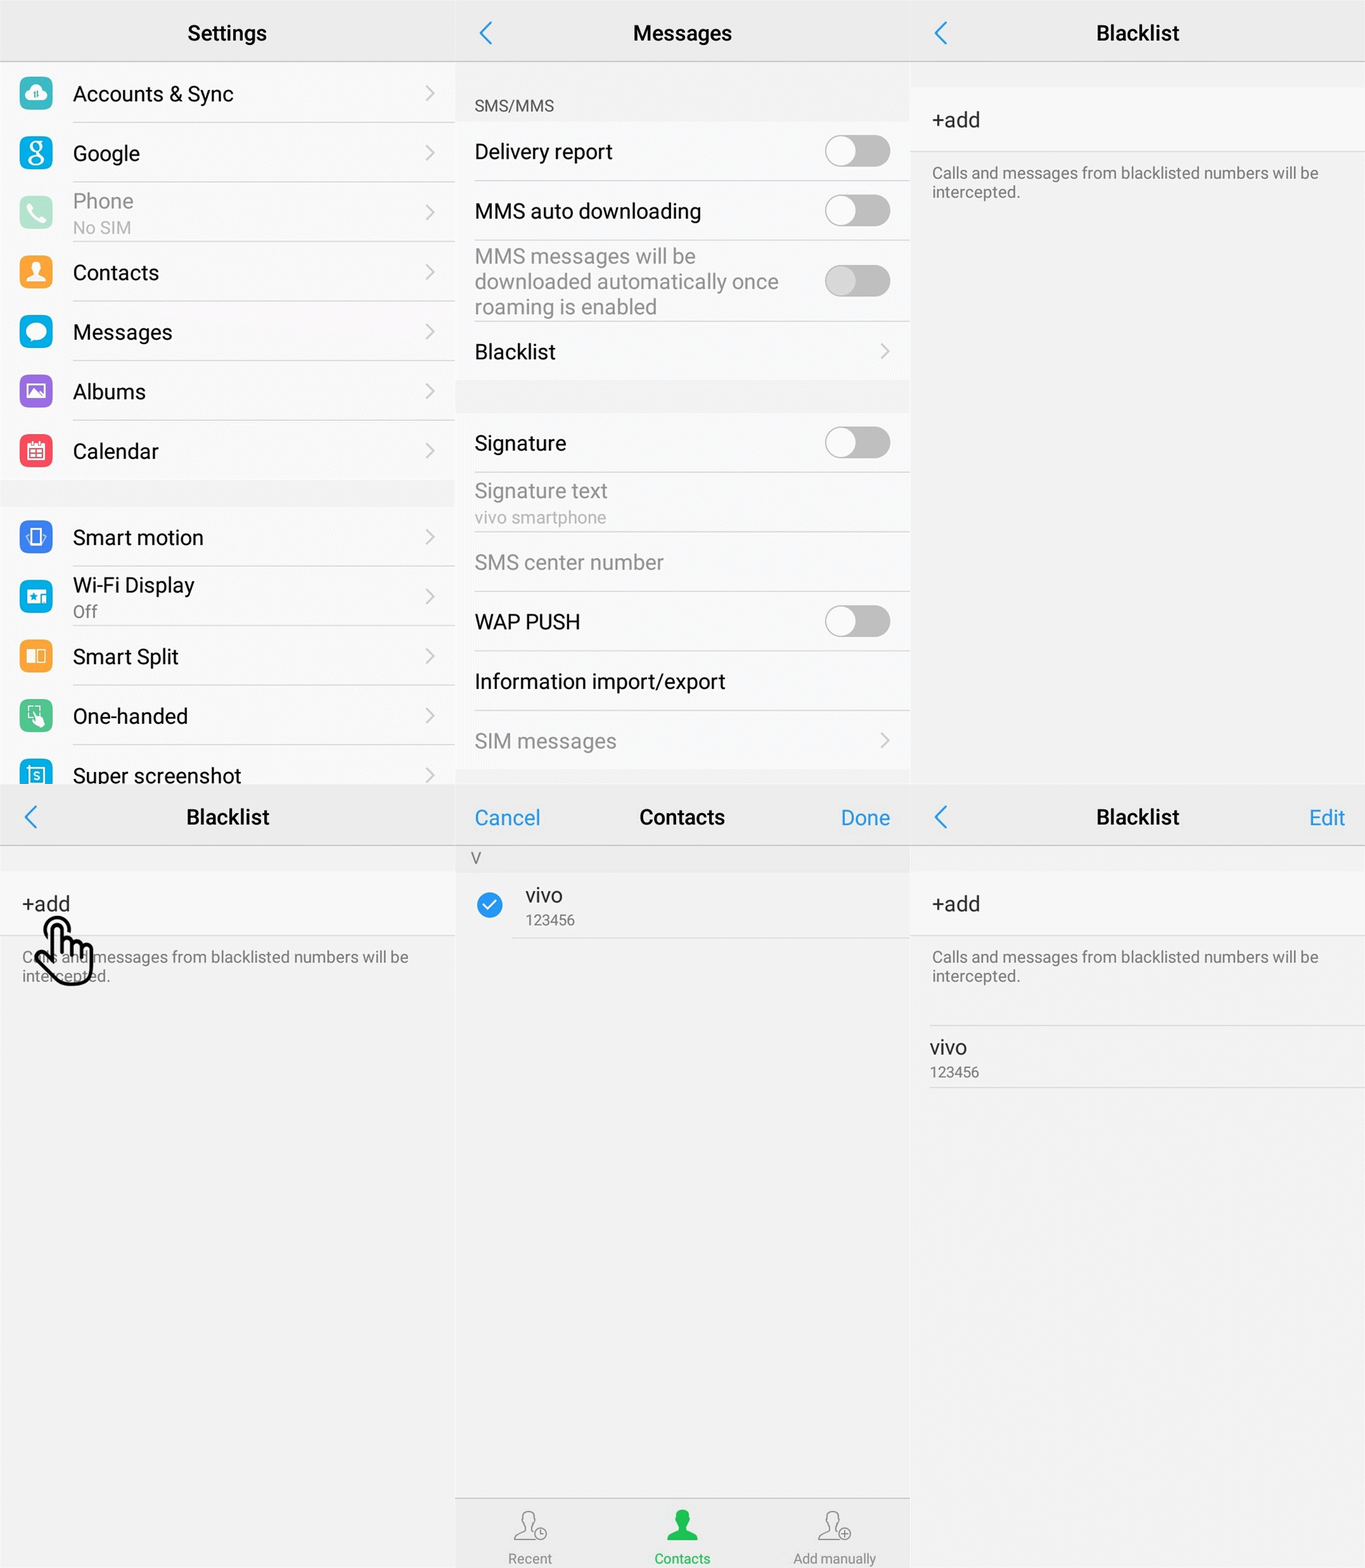
For Funtouch OS 3.0 and higher version, you can enter Settings>Messages>Blacklist>+add to add the contacts or numbers to Blacklist.
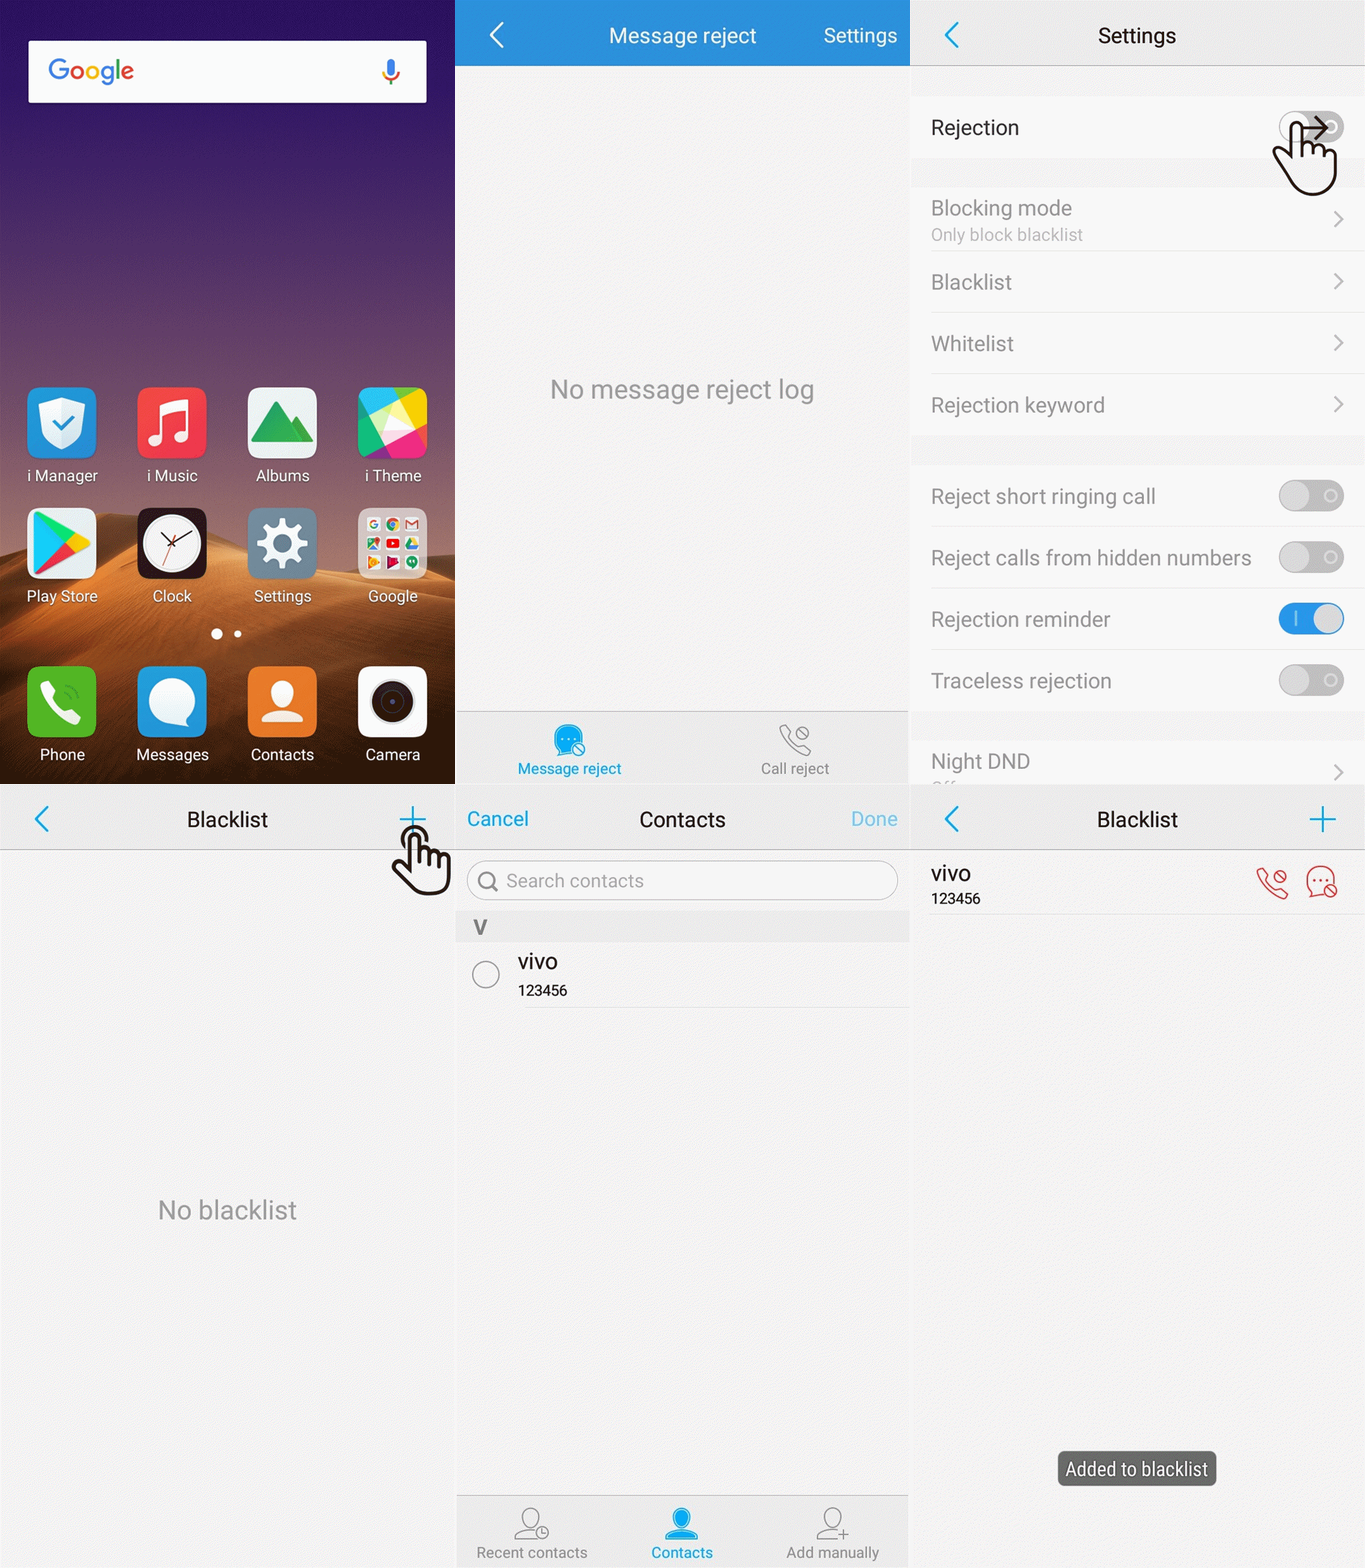
For Funtouch OS 2.6 and lower version, you can go to i Manager>Rejection>Settings>Blacklistto add the contacts or numbers to Blacklist. Don`t forget to turn on Rejection switch.
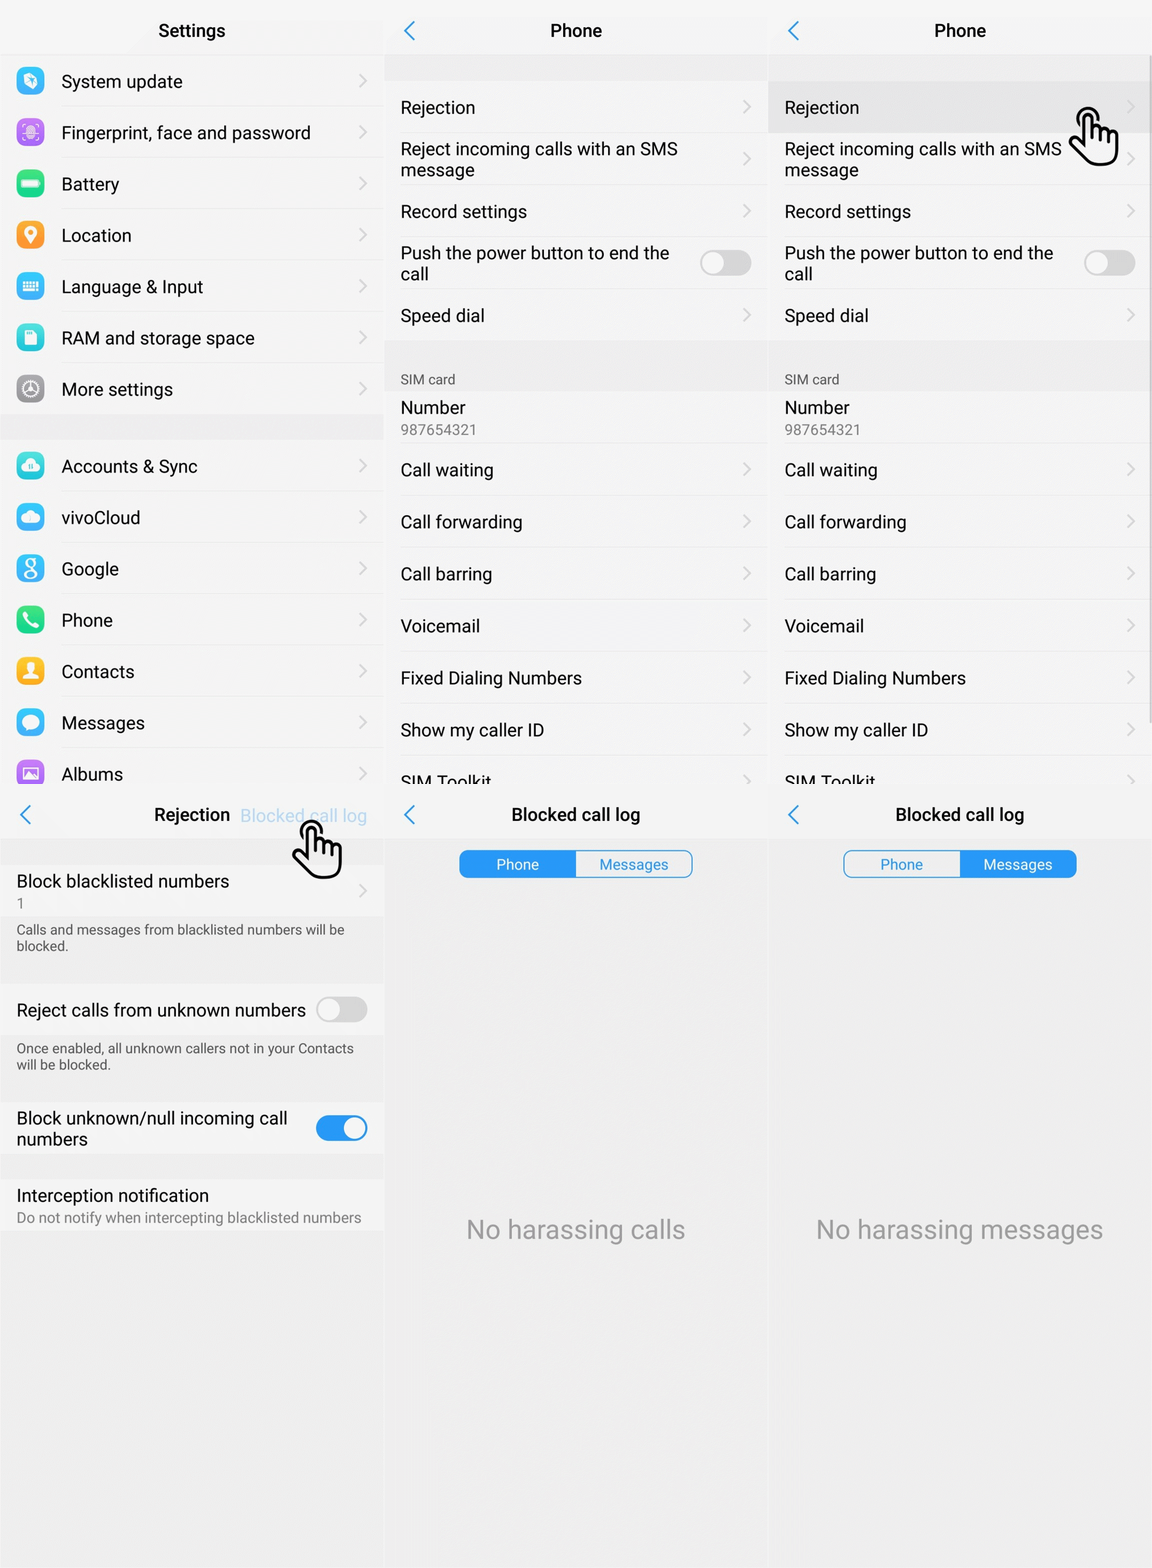
For Funtouch OS 9.0 and higher version, you can find the rejected messages in Settings>System app settings>Phone>Rejection>Blocked call log>Messages.
For Funtouch OS 4.0 and higher version, you can check it in Settings>Phone>Rejection>Blocked call log>Messages.
For Funtouch OS 3.0 and higher version, there are no blocked messages logs.
For Funtouch OS 2.6 and lower version, you can check it by heading to i Manager>Rejection>Message reject.
There will be a “busy” notification to him if he calls you.
For Funtouch OS 9.0 and higher version, you can find the rejection logs in Blocked call loginterface in Settings>System app settings>Phone>Rejection>Blocked call log at the upper right corner;
For Funtouch OS 4.0 and higher version, you can find the rejection logs in Blocked call log interface in Settings>Phone>Rejection>Blocked call log at the upper right corner;
For Funtouch OS 3.0 and higher version, there are no rejection logs.
For Funtouch OS 2.6 and lower version, please go to i Manager>Rejection, and then you can find the Message rejection and Call rejection logs.
For Funtouch OS 4.0 and higher version, the rejection logs can be seen by default and cannot be disabled.
For Funtouch OS 3.0, 3.1 & 3.2, there are no call and messages rejection logs.
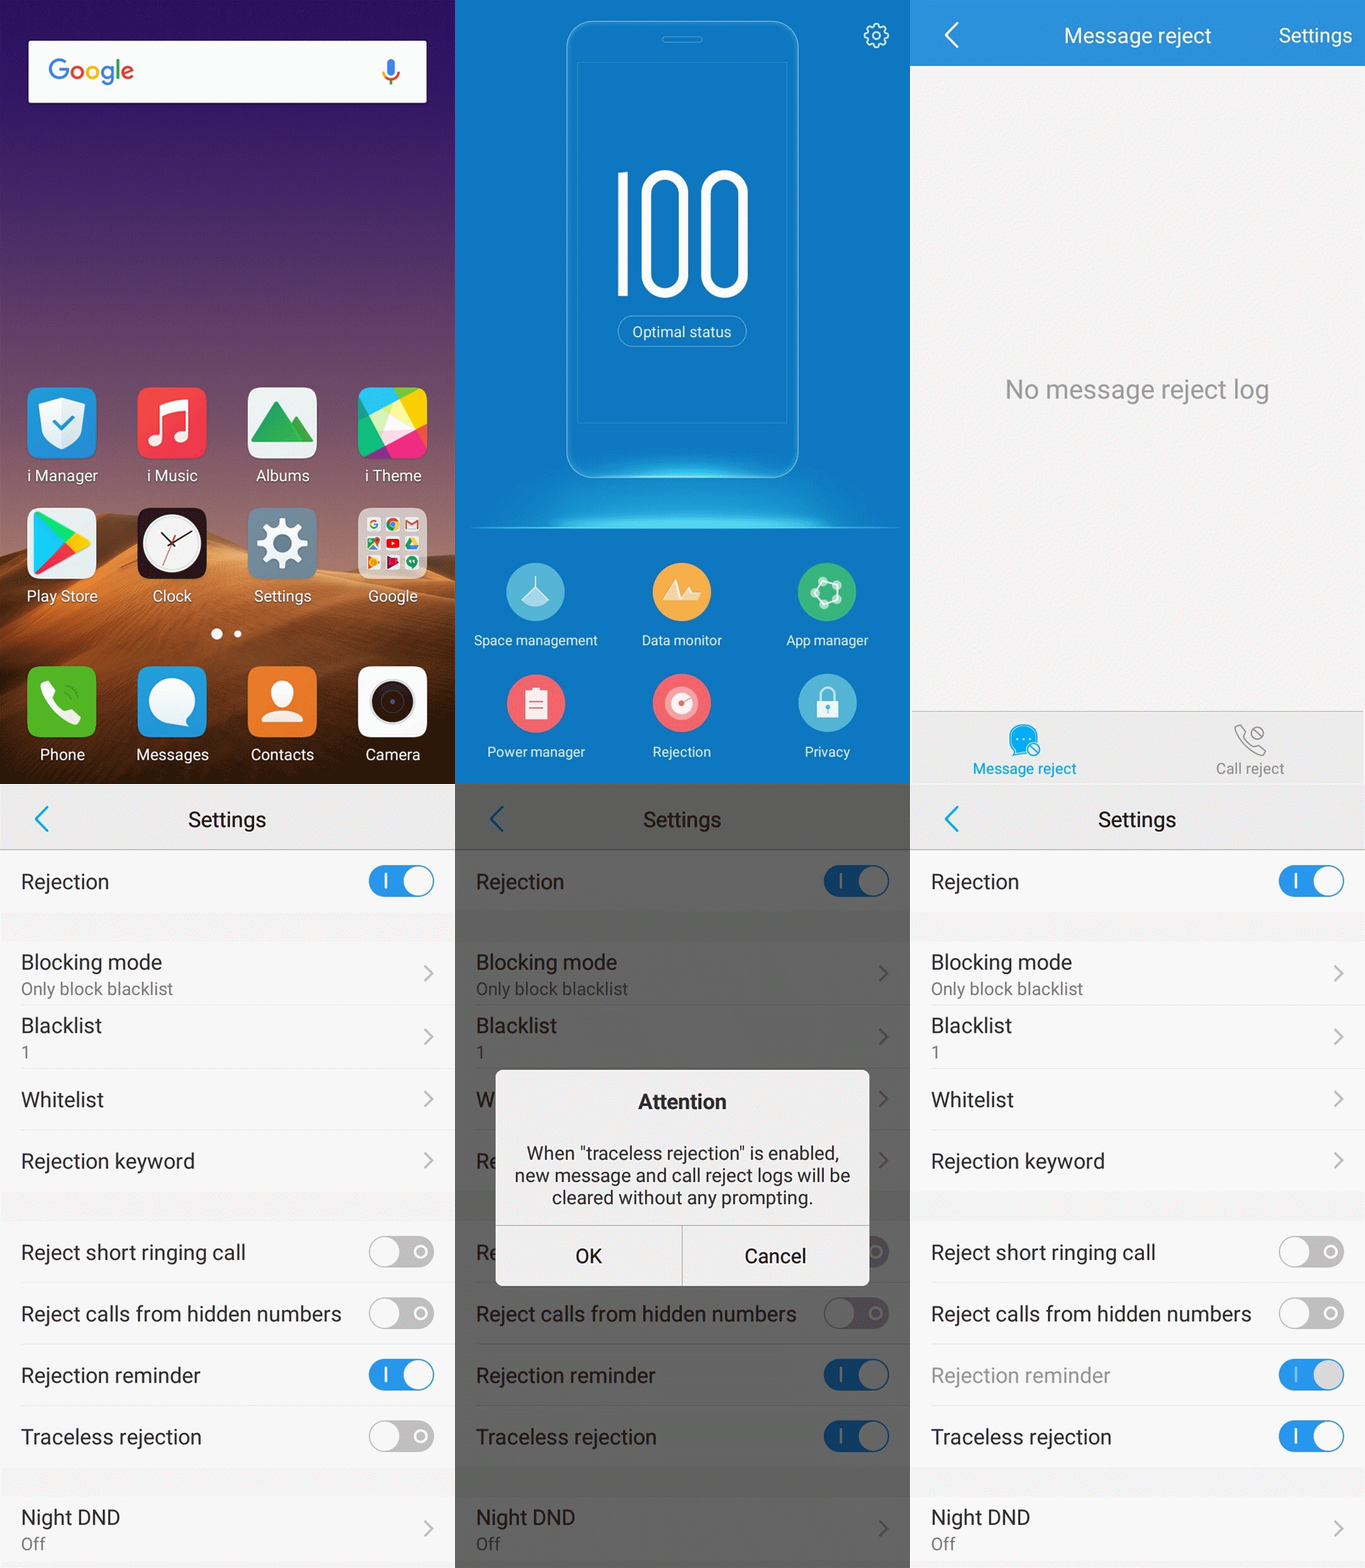
For Funtouch OS 2.6 and lower version, please go to i Manager>Rejection>Message reject>Settings, turn on Traceless rejection, and then the rejection logs won`t be recorded.
Since the lock screen password is with the maximum security, it is necessary to set the lock screen password before adding the fingerprint.
You can refer to the methods below:
1. Use your dominant fingers to record the fingerprint information and move your finger while recording to make sure your fingerprint information is recorded completely;
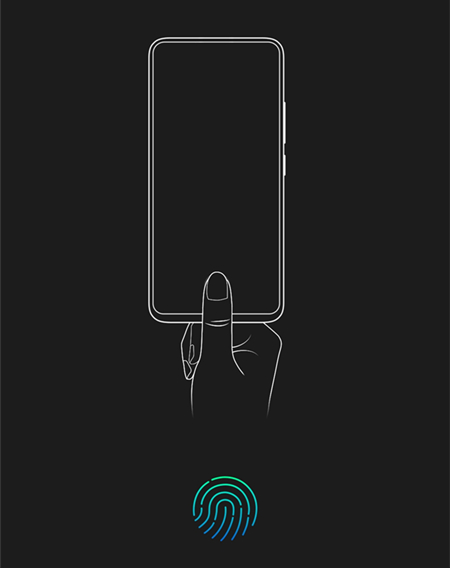
2. Make sure the Fingerprint icon area and your finger are clean and dry when recording your fingerprint information and using the Fingerprint recognition;

3. Press down the screen slightly and let your finger cover the Fingerprint icon completely until it gets unlocked;

4. Go to Settings>Fingerprint, face and password>turn on Fingerprint and Face Unlock(Some phones do not support this feature) to improve the recognition speed;

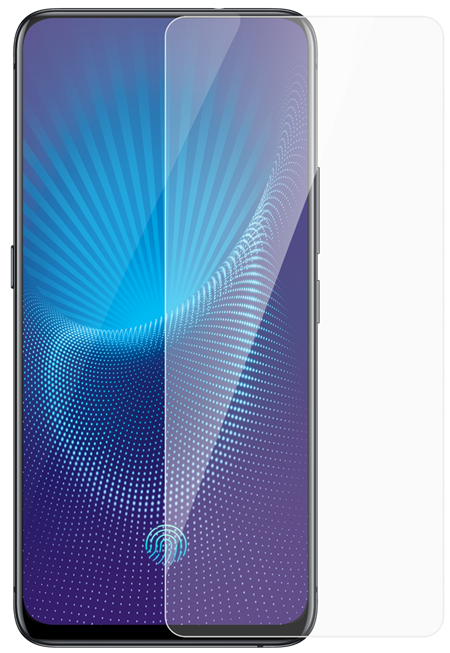
5. The original protective film is specially designed for Vivo phones with In-Display Fingerprint and can improve the success rate of In-Display Fingerprint. We highly recommend you use the original protective film;
6. Make sure the version of your phone is latest. You can go to Settings>System update to check for new version.
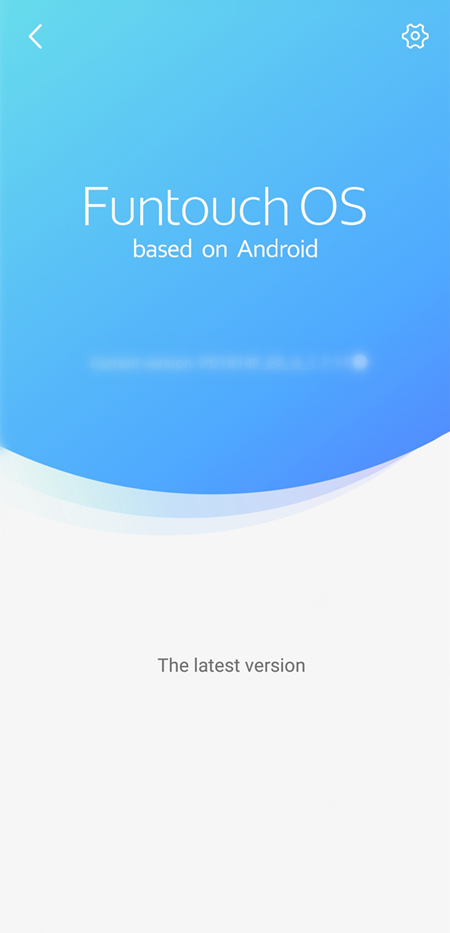
Please don`t worry, here some helpful methods for you:
1. Use your dominant fingers to record the fingerprint information and move your finger while recording to make sure your fingerprint information is recorded completely;
2. Make sure the Fingerprint area and your finger are clean and dry when recording your fingerprint information and using the Fingerprint recognition;
3. Let your finger cover the Fingerprint area completely until it gets unlocked;
4. Delete existing fingerprints, and then add new fingerprints again;
5. Update your phone to the latest version;
If above measures are not effective, please seek help from our service center.